Adding a custom chat assistant to your Shopify website.
- First, log into your Dropchat account.
- Click into any of the chatbots you have made previously. If you have not made a chatbot before, check out this guide. In this example, we will use a chatbot we already made from a PDF of the Bitcoin white paper.
- After clicking into your chatbot, navigate to the "Manage Chatbot" tab towards the top left.

- In the middle section, under "Share Chatbot", click the blue "Embed" button.

A pop-up will appear with options on how to add a Dropchat to your site. In this example, we will be creating a chat bubble in the bottom right of your site, which is the most user-friendly option for most websites.
- Click the "Copy Code" icon on the top code snippet option.

Now that you have this code snippet copy-pasted, we can go to Shopify
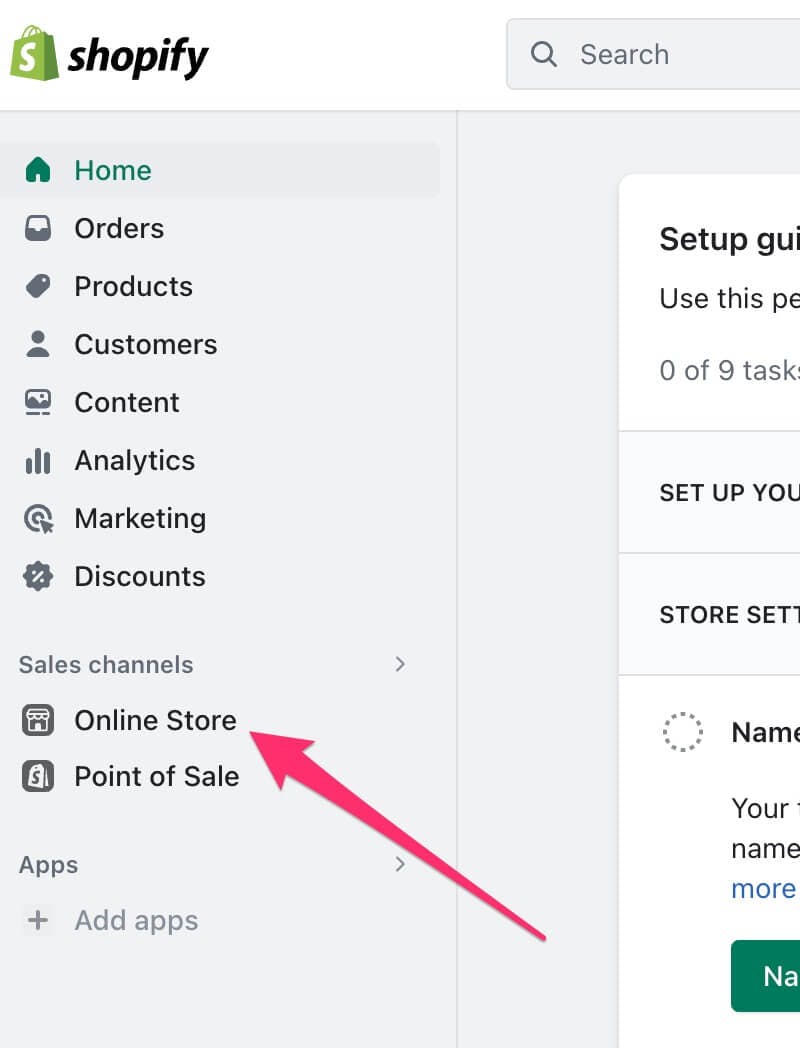
Go to your Shopify dashboard and click on Online Store from the menu. It is located under the Sales channels section.

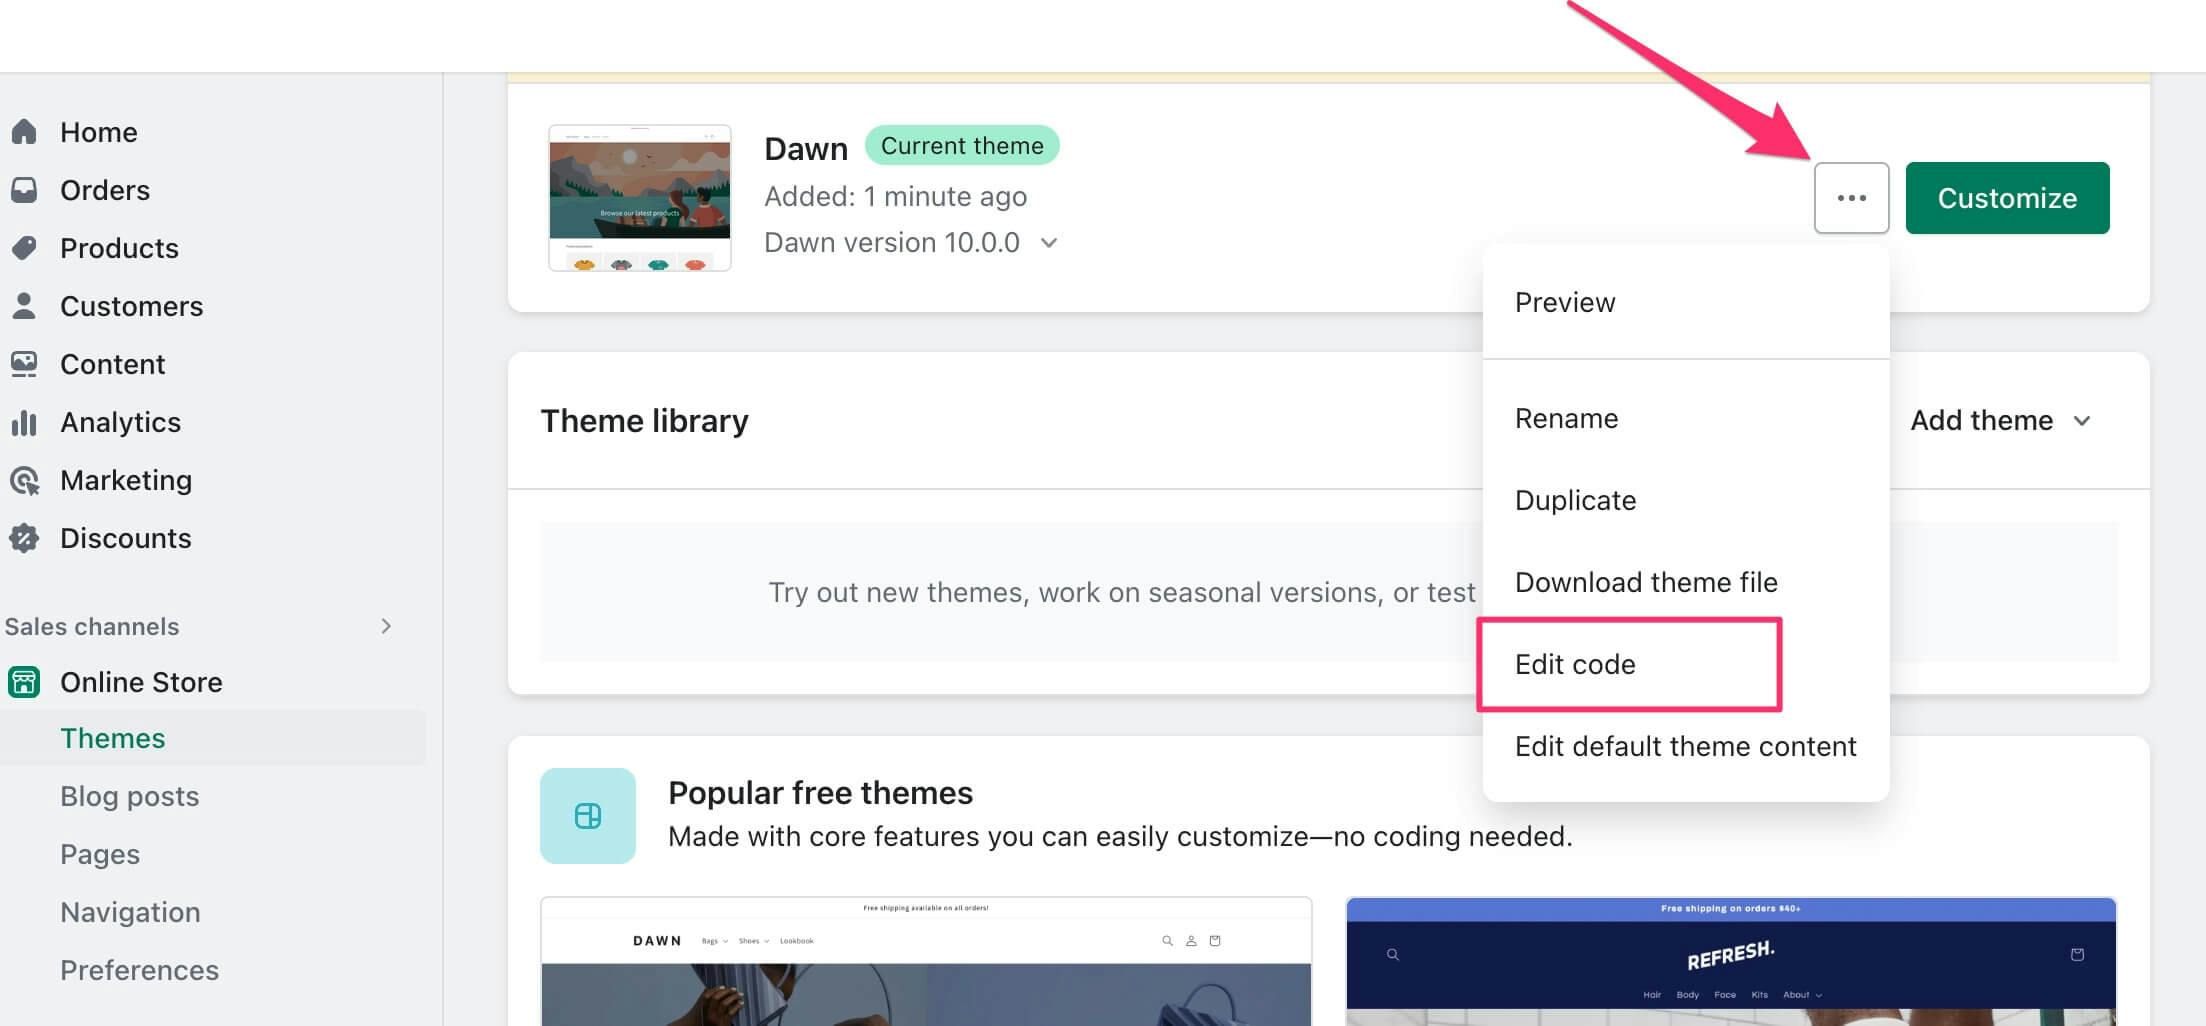
Edit your theme by clicking the ellipsis icon next to your current theme and choosing Edit code.

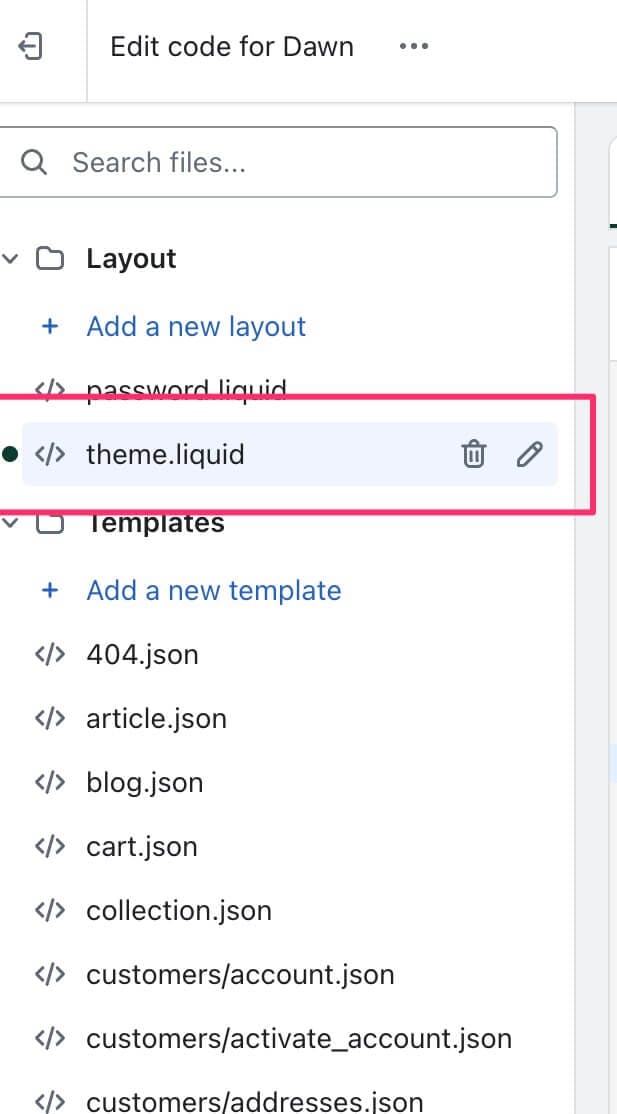
Find and open the theme.liquid file From the sidebar where the list of files is displayed.

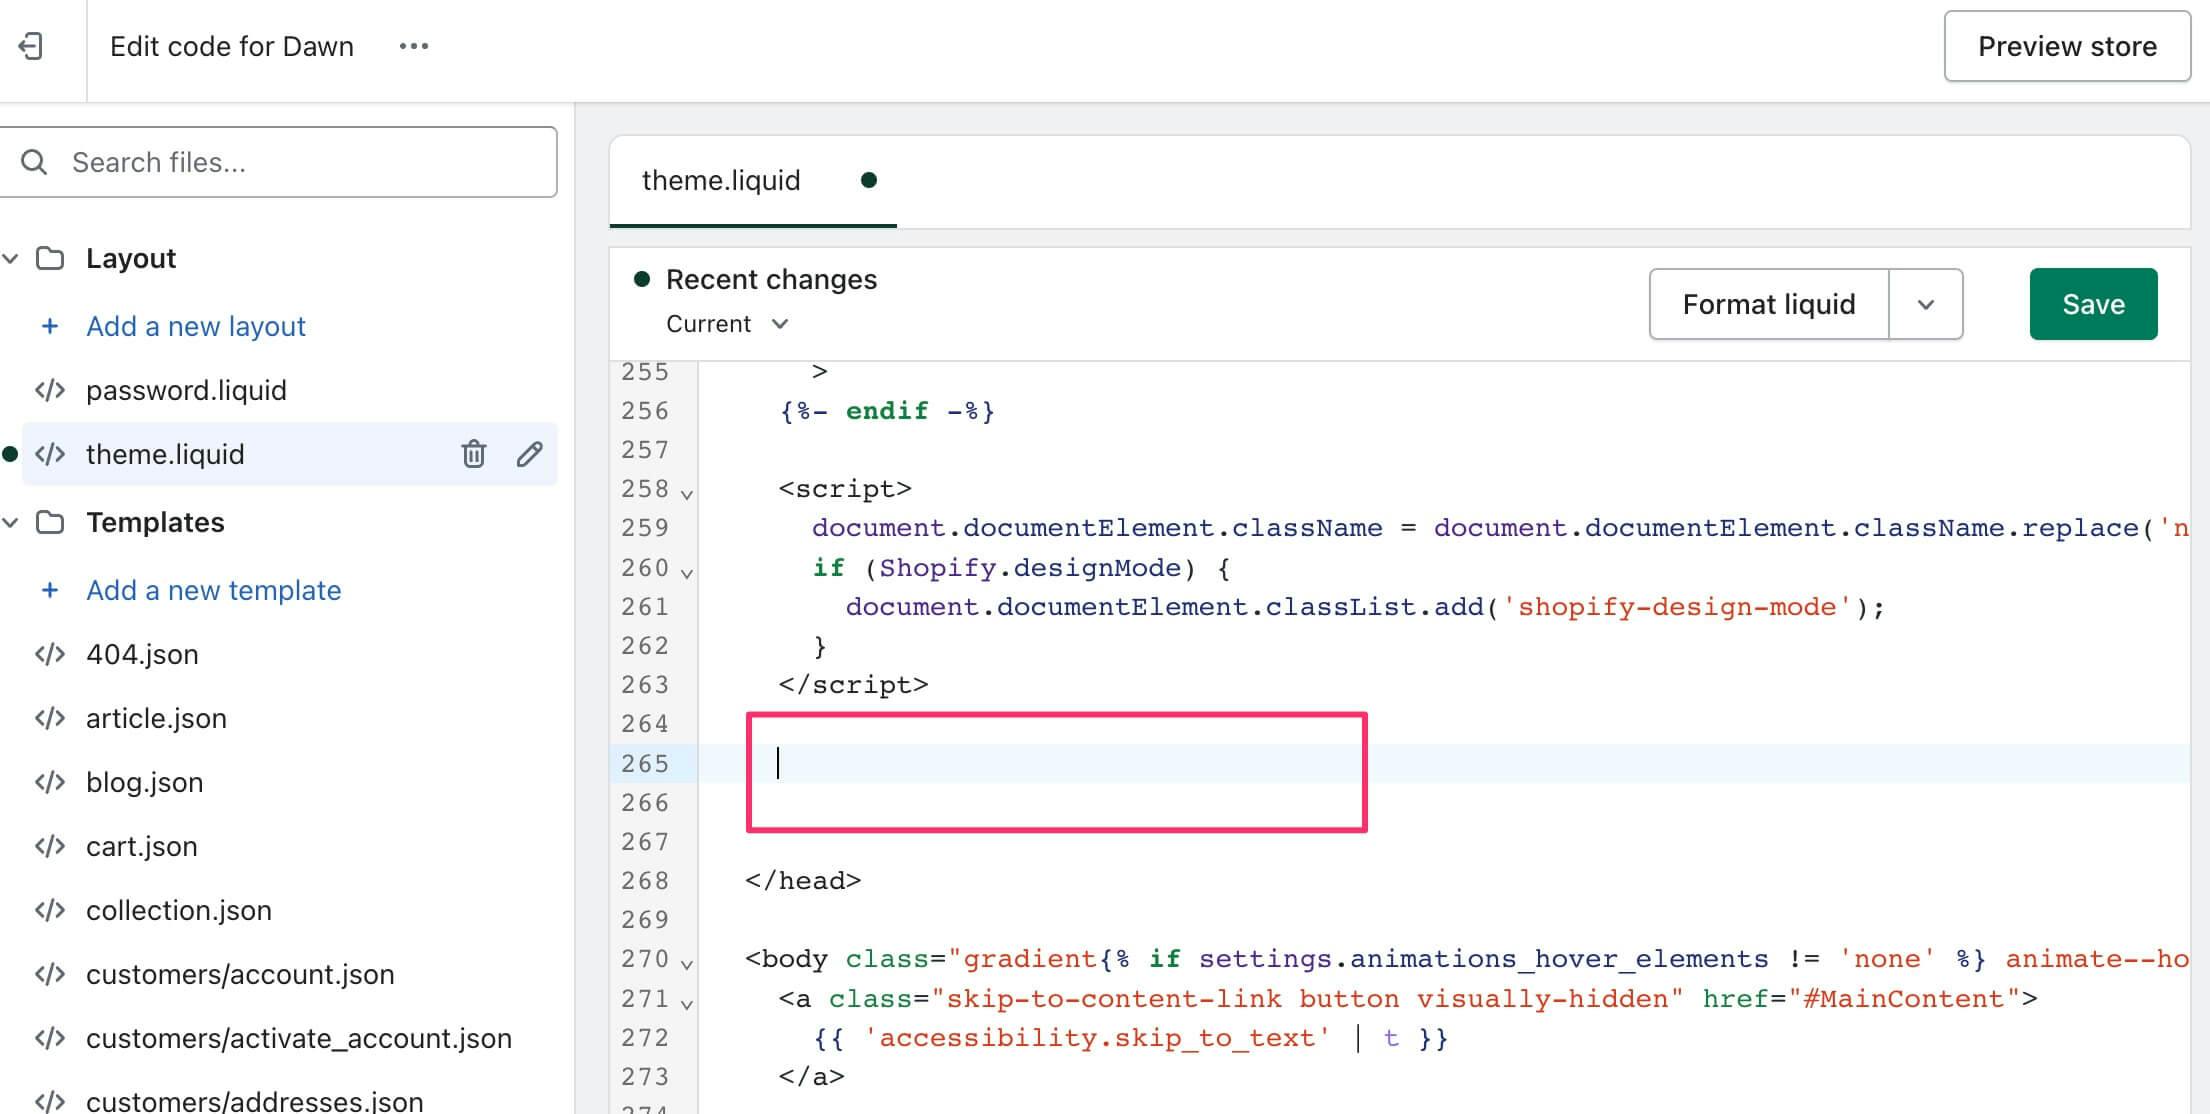
Paste the embed code in the <head> section. You can paste it anywhere between the opening <head> tag and the closing </head> tag.

The chatbot will be live on your website and should appear across all your store's pages.
